
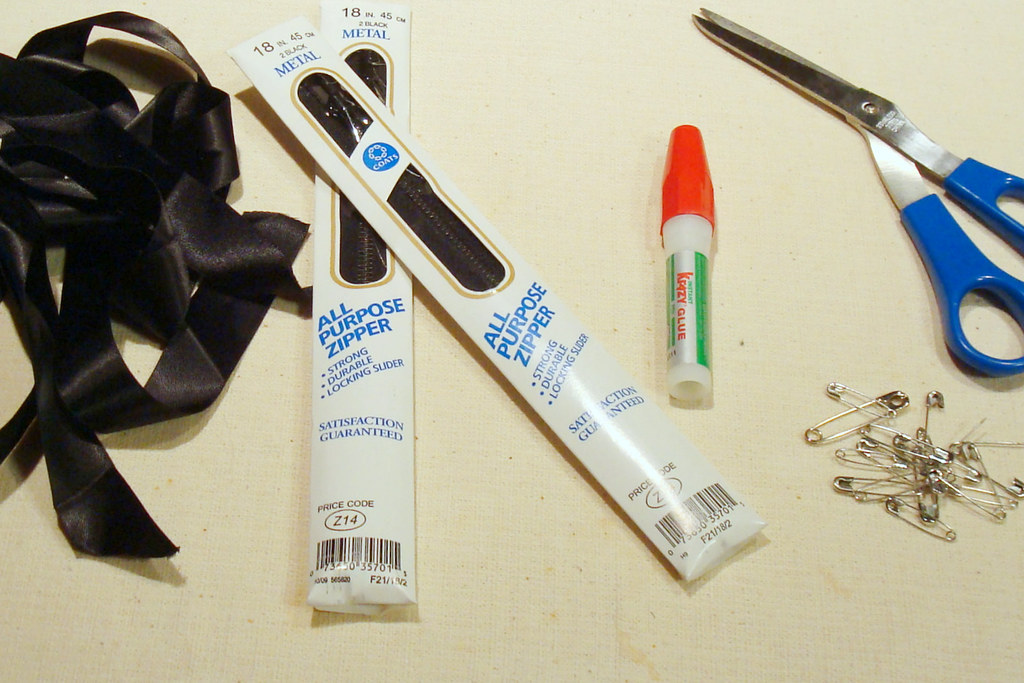
Materials you'll need:
2 pairs of 18inch zippers
2 yards of satin ribbon (cut in half)
thread in the same color as the zipper
needle
scissors
safety pins
super glue (optional)
2 yards of satin ribbon (cut in half)
thread in the same color as the zipper
needle
scissors
safety pins
super glue (optional)
Steps:
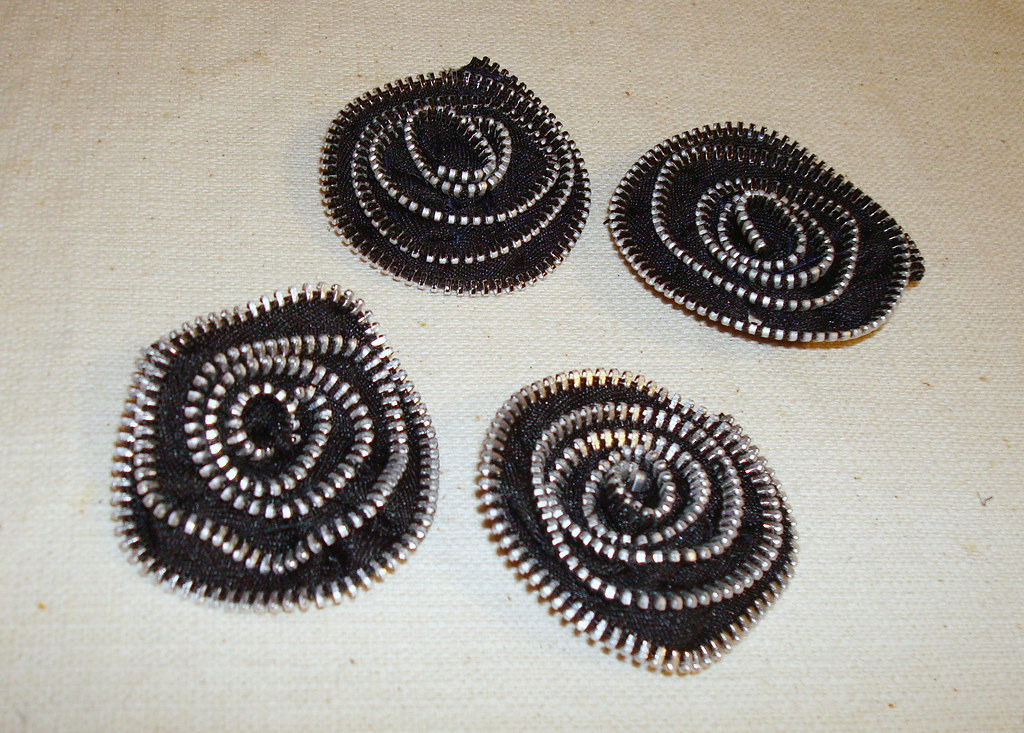
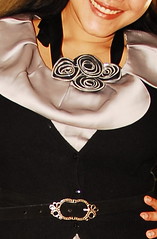
1. Separate the zippers by cutting off the slider and the excess tape ends leaving only the teeth part.
2. Stitch each into a rosette. The first round of petal is a bit tricky but it gets easier as the petal gets bigger.
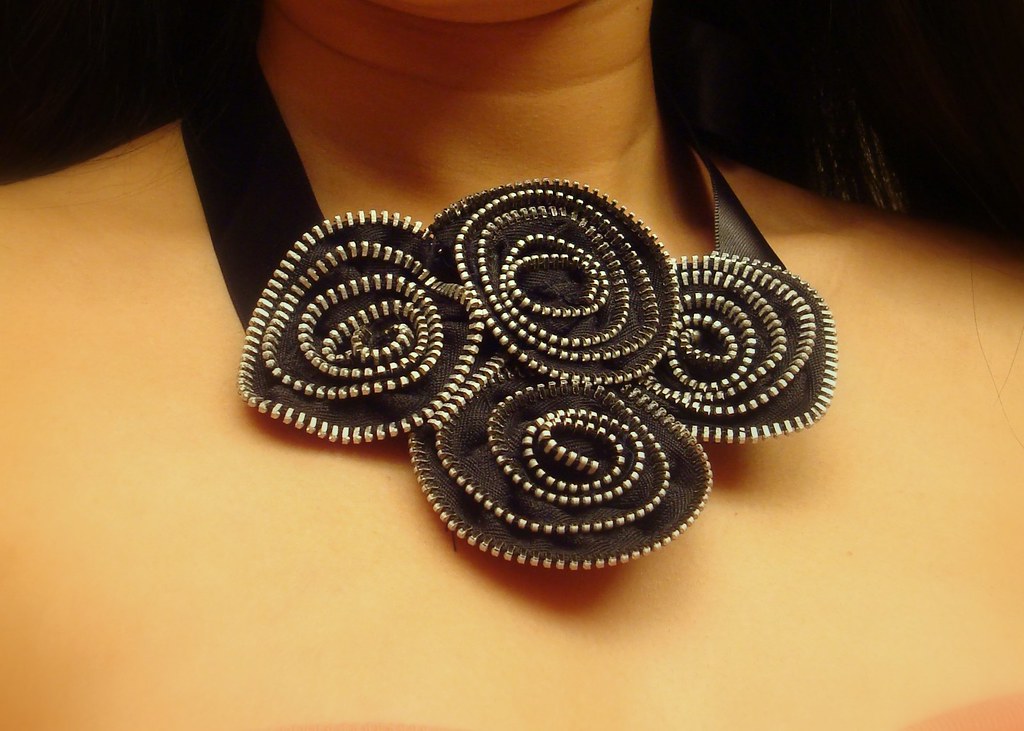
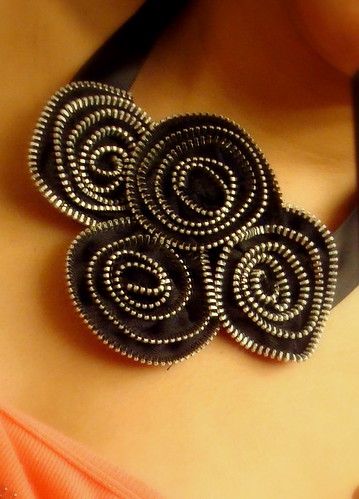
3. Using safety pins, arrange the 4 rosettes as you'd like it and stitch it in place.
4. Again using safety pins, place the satin ribbon on the sides. Make sure to try it around your neck before you stitch it in place.
5. Optional: You can glue them together too if you want.
6. Done!

Total cost for this DIY is $4.50 and it only took 2 hours while watching TV.
Have fun!
Have fun!


love it Ms. Grace!must try! :)
ReplyDeleteGrace, this looks super easy and is so cute!
ReplyDeleteOmgoodness, I can't believe you MADE this! I absolutely have to try this this weekend. Hopefully mine turns out as well as yours did.
ReplyDeleteGrace, you're amazing girl! I love the necklace.
ReplyDeletexoxo Nini
Happy Friday, Grace!
ReplyDeleteSooo finally.... here I am ;)
You did truly such a great job!!! Is it your very first DIY?
It looks superstylish!
Did you see Ann Demeulemeester´s "zipper" necklaces for SS10?
Looks also great for DIY but I have the fear I´m so untalented for
things like this ;)
YOu can check the necklace here:
http://www.couturelab.com/products/White_Fine_Zip_Necklace_Belt-5010-c242.html
After yesterday´s "jiiiippiiiieh spring is here"... it´s looks today more like: "fall is back" ;)
Have a wonderful sunshiney (love that word from you, Grace) day in Minneapolis!
Say a lovely hello to Kat!!!
The mind boggles... Amazing. Lovely idea and thanks so much for the instructions.
ReplyDeletefantastic tip that is great. I will definitevely reproduce it!!!
ReplyDeletehttp://www.iletaitunefoisundressing.com/
Great job! Wish I was more crafty...
ReplyDeletewow, this is so pretty! i hope i have the half the artistic ability you have...
ReplyDeletexx,
betz
http://herarmoire.blogspot.com
what a great and easy DIY. I was thinking of buying a bib necklace just never did.
ReplyDeleteBravo!;)I wish I have your talent and patience but I can try doing this. Thanks for sharing,G!:)
ReplyDeleteI've seen these around and when I was in Scotland, the brooch version of this was all the rage as well! I never considered a DIY (I'm actually horrible at that sort of thing), but this looks so gorgeous I might give it a try.
ReplyDeleteOh, and love those 'cow' shoes from your last post ;-)
great job! i can't wait to see you style it. :)
ReplyDeleteThank you all for the lovely comments!
ReplyDeleteWow, it looks so nice!!!!!!!!! i want to try it....
ReplyDeletewow! that's a nice idea....thanks!!!
ReplyDeleteI'm sorry but you are not showing the essential part in this tutorial.. The hard part in not to put 4 rosettes on a ribbon, it's to make those rosettes... I tried on my own for hours (I was so happy that somebody finally explains how to do it).. but I couldn't convince the zippers to stay in that shape...with glue and pins and anything. I would like to see the back of your rosettes and how they look during the process of shaping... Thanks in advance!
ReplyDelete